Showing posts with label Dessert. Show all posts

Monday, October 10, 2011

Chocolate Zucchini Bread and Muffins


This is a delicious and healthy way to enjoy the end of zucchini season. Now that Autumn is in full swing and we are getting some cold and rainy days, there is tendency for people to want to spend a day cozied up with a good book and fluffy slippers. Don't lie, you know as well as I do that this cozy day usually involves indulging in some favorite warm food with more calories that you'd care to count. This Chocolate Zucchini Bread is a perfect solution! You get the yumminess of the warm chocolaty carbs that is secretly packed with low calorie zucchini and apple sauce! There is so much flexibility in this recipe, you can make bread or muffins or both, you can make it chocolaty or plain, healthy or traditional.

What you will need:
2 1/2 cups Zucchini
3/4 cup Unsweetened Apple Sauce
1/3 cup Canola Oil
3 Eggs
2 tsp Vanilla Extract
1/2 cup Brown Sugar
1/3 cup Honey
3 cups Flour
1/2 cup Unsweetened Cocoa Powder
3 Tbs Ground Flax Seed
2 tsp  Cinnamon
1/4 tsp Nutmeg
1/4 tsp Allspice
1/4 tsp Ginger
1 tsp Salt
1 tsp Baking Soda
1/4 tsp Baking Powder
1/4 cup Raisins
1/4 cup Chopped Almonds

First lets get the zucchini grated so it is ready to go. Be sure to leave the skin on because it is full of nutrients such as potassium, folates, fiber, as well as vitamins A B and C. Use the large side of  a cheese grater to grate roughly 2 1/2 cups and set aside.
In a large bowl combine the apple sauce, canola oil, eggs, vanilla extract, brown sugar and honey and stir together with a spoon. Then stir in the grated zucchini.
In a separate bowl combine the flour, cocoa powder, ground flax seed (you can grind the flax seeds in a coffee grinder or use flax meal), cinnamon, nutmeg, allspice, ginger, salt, baking soda, and baking powder. Once these are combined you can slowly stir it in to the wet mixture. Then stir in the raisins and almonds (walnuts or pecans would be good too).
Set your oven to 350 and grease your bread pan and/or muffin tins. This will make roughly 2 bread loaves or 24 muffins. The muffins will need to bake for about 20 minutes and the loaves will need 50-60 minutes or until a toothpick comes  out clean. Let them cool for 10 minutes before placing on a cooling rack.
Enjoy this scrumptious and healthy treat!

Wednesday, July 27, 2011

Carrot Cake

This cake is so delicious!!! This is the cake my mom asked me to make her for her last two birthdays, and in the spirit of the big day, July 26th, it was time to make the good ol' Carrot Cake.
So, Happy Birthday Mom!
A carrot cake might make you think "healthy cake"  due to all the vegetable, but I promise there is nothing healthy or diet about this cake. Just surrender to temptation, it will be worth it. It is dense and moist, sweet and a little spicy.

This recipe makes a really big cake so try not to cry at the amount of oil, sugar, cream cheese and what not. Just have a party so you can share it!

What you will need:
Cake Batter
1 1/4 cup Canola Oil
4 Eggs
1 cup White Sugar
1 cup Brown Sugar
3 tsp Vanilla Extract
2 cups Flour
2 tsp Baking Soda
2 tsp Baking Powder
1/2 tsp Salt
3 tsp Cinnamon
1 tsp Pumpkin Pie Spice
3 cups Grated Carrots
1 cup Chopped Walnuts

Frosting
1/2 cup Butter, softened
8 ounces Cream Cheese, softened
1 tsp Vanilla Extract
3 cups Powdered Sugar
3/4 cup Chopped Walnuts

Preheat your oven to 350 and grease a 9x13 baking dish.
Let's start by grating the carrots, the picture above is a gross overstatement of the number of carrots you will need, it will be closer to 4. Wash the carrots and peel them if you like, I chose to skip the peeling. Be sure to use the side of your grater with the largest holes, if you use the smaller holes you end up with carrot mush and that will lead to Carrot Mush Cake. Grate 3 cups worth of carrot and set aside.

In a large mixing bowl combine the 1 1/4 of Canola Oil, 4 Eggs, 1 cup White Sugar, 1 cup Brown Sugar, and 3 tsp Vanilla Extract. I substituted in 1/4 cup of Grapeseed Oil which is why mine looks green, but it is not necessary, I just like it and have it on hand. Use beaters until smooth.


Now add 2 cups Flour, 2 tsp Baking Soda, 2 tsp Baking Powder, 1/2 tsp Salt, 3 tsp Cinnamon, 1 tsp Pumpkin Pie Spice (or Nutmeg). Beat ingredients together until smooth.

Now add the 3 cups of Grated Carrots. Use a spoon or a spatula to mix the carrots into the batter.
Next stir in 1 cup of Chopped Walnuts.


Pour the batter into the greased 9x13 baking dish and spread it out evenly. I know the cake looks kind of disgusting at this step, so try to keep in mind that it will look and taste a lot better after it is cooked :)                            
Bake for 40 to 50 minutes. Mine was ready at 48 minutes. At 40 minutes you can check the cake by pulling it out and giving it a little wiggle. If the cake is jiggly in the middle then it needs more time to set up. Don't walk away and forget about it though! At this stage a few minutes can make a big different. Carrot Cakes should be nice and moist so be careful not to over cook it.


Now doesn't that look better??
Let the cake cool completely before frosting. . .this is important, if you frost it too soon your cake will be strangely soggy from all of the steam trapped under the frosting. I chose to only frost the top of the cake since I wanted to keep it in the baking dish. If you would like to frost all of the sides as well, let the cake cool for at least 10 minutes before flipping it onto a large cooling rack.


On to the frosting!
In a medium sized bowl slightly soften 1 stick of Butter and 8 ounces of Cream Cheese. Add 1 tsp of  Vanilla (optionally add 1 tsp of Cinnamon). Beat together until smooth. Slowly beat in 3 cups of Powdered Sugar until all is combined. Stir in 3/4 cup Chopped Walnuts.
Spread the frosting over the cake evenly.
Keep the cake covered and refrigerated. To keep the cover from sticking to all of the frosting, you can make a little tent using toothpicks or coffee stir sticks around the edges of the cake and cover it in tin foil.

Enjoy!!!

Tuesday, March 1, 2011

Chocolate Peanut Butter Cup Cookies

These cookies are soft and rich, salty and sweet. Good luck eating just one!

What you will need:

1/2 cup Butter
1/2 cup Peanut Butter
1/3 cup White Sugar
1/3 cup Brown Sugar
1 Egg
1 tsp Vanilla
2 Tbs Milk
1 1/2 cup Flour
1 Tbs Unsweetened Cocoa
1/2 tsp Salt
1 tsp Baking Soda
Mini Peanut Butter Cups (I used the Dark Chocolate Peanut Butter Cups from Trader Joe's)

2 Muffin Tins (or a lot of patience)
Since these cookies are so soft and fluffy, you can't move them when they are hot or they just fall apart, trust me, I tried. If you have 2 muffin tins it will go faster.

Preheat your oven to 350˚
In a medium bowl soften the butter. Then add the peanut butter and mix until creamy. Add the sugars, egg, vanilla, milk, and mix again. Add the flour, cocoa, salt, and baking soda, and mix.

Scoop 1"-1 /1/2" sized balls of dough into each cup of a muffin tin. Then press a peanut butter cup into the center of each dough ball. Bake for 9 minutes.

This cookie sheet is just how I served them, not baked them.
These need to be completely cooled in order for you to get them out of the muffin tin without destroying them. So, you can either wait patiently or you can put the whole thing in the freezer for about 5 minutes. This way the dough and chocolate will set up. Once they are cool, use a spoon to go around the sides of the cookie, then gently scoop it out of the cup and put it on a plate (not a paper towel). Also, I would recommend starting with the ugliest cookie in case they aren't quite ready yet and it falls apart. I didn't feel like waiting until this step to make the final round of cookies, so I just stored the rest of my dough in the fridge to use later. With two muffin tins I got 24 cookies, and that was enough for what I needed. This batch will make about 24-32 cookies. Enjoy!

Might I recommend pairing these with a glass of milk first and foremost,
and secondly a trip to the gym!

Sunday, February 27, 2011

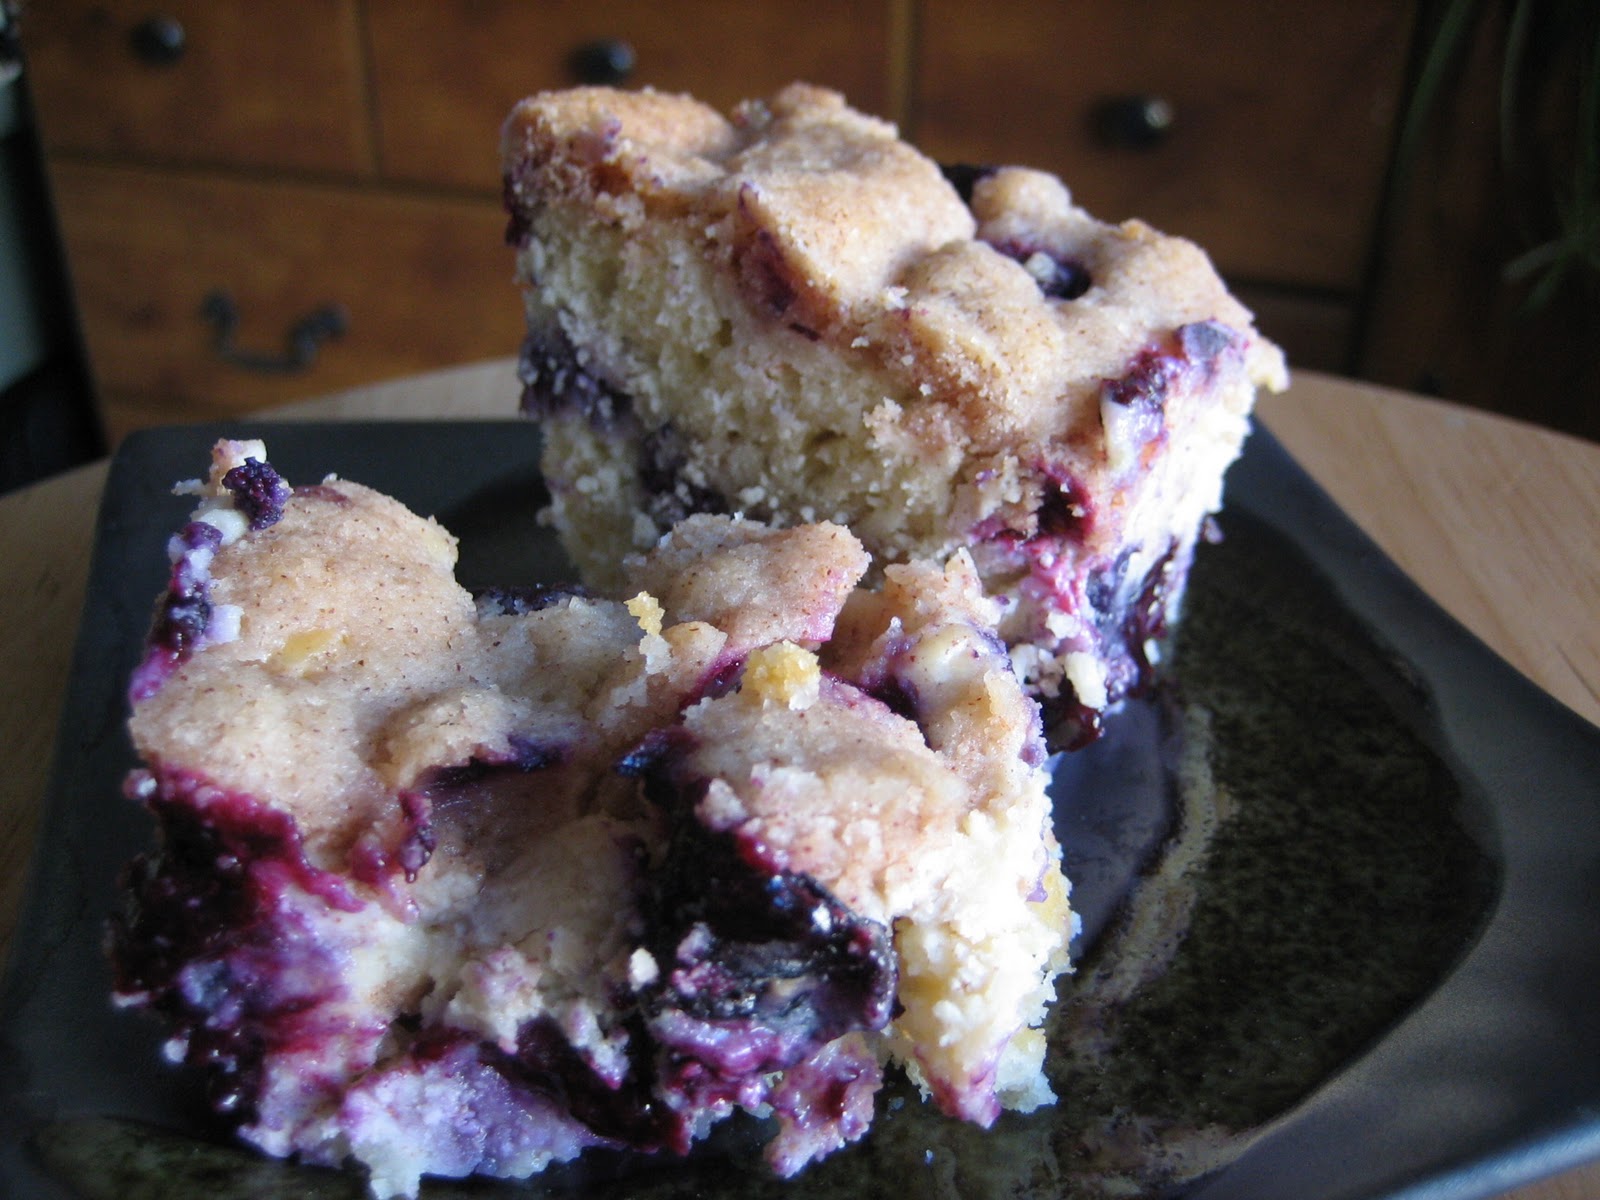
Blueberry Cream Cheese Crumb Cake

This scrumptious cake is soft, gooey, fluffy, and crunchy all in one! Think coffee cake meets cheesecake meets berry pie. I used blueberries but blackberries would be really good too.

Blueberry Cream Cheese Crumb Cake

This is put together by layering batter, cream cheese mix, blueberries, and crumble mix.
Preheat your oven to 350˚F.
You will need three medium sized bowls. 

Cream Cheese:
5 oz. Cream Cheese
1 Tbs Heavy Cream
1 Tbs White Sugar
1 tsp Cinnamon
1 tsp Vanilla Extract

Cut 5 oz of cream cheese into a bowl and either let it sit on the counter for a while or warm it up in the microwave for a few seconds. Once it is soft add the cream, sugar, cinnamon, and vanilla. Stir together until incorporated and set aside.

Batter:
3/4 cup White Sugar
1/4 cup Butter (softened)
1 Egg
1 1/2 cup Flour
2 tsp Baking Powder
1/2 tsp Salt
1/4 cup Milk
1/4 cup Heavy Cream

Stir together sugar, butter, and egg. Add flour, baking powder, and salt. Then add the milk and cream and stir until smooth and set aside.

Blueberries:
2 cups Blueberries

Wash and dry the blueberries. Pick over for duds and set aside.

Crumble:
1/2 cup Butter
2/3 cup Flour
1/2 cup White Sugar
1 tsp Cinnamon

Soften butter in a bowl (careful not to melt it) and stir in the flour, sugar, and cinnamon. Once this is mixed up set it aside.


Grease a 8x8 or 9x9 baking pan. Now you are ready to start layering!
Spread 1/2 of the batter into the bottom of the pan.
Dot 1/2 of the cream cheese mixture on top of the batter and spread it out as best you can.
Use your fingers, it helps!


Spread out most of the blueberries. Save about 1/2 a cup of blueberries for the top.
Then sprinkle in a little less than 1/2 of the crumble mixture (oops, I forgot to take a picture of this step).

Now add the rest of the batter and spread out as evenly as you can.


Spread out the rest of the cream cheese mixture.
Top with the remaining blueberries.


Now finish it off with the rest of the crumble mixture so the blueberries are just peeking through.


Place on the center rack and bake for about 40 minutes. The top edges should be crispy and brown.


This would pair well with a scoop of ice cream or a cup of coffee. Best served warm.


Enjoy!!!